The Smartest Way To Delete Duplicates From Nikon Camera
Get Rid Of All Exact & Similar Looking Photos From Your Camera!
In the lure of a perfect shot, we click a lot of pics on our digital cameras. But a problem arises when we need to find the best one from similar-looking snaps. Use Duplicate Photos Fixer!

For Windows 11/10/8.1/8/7 (Both 32 & 64 Bit)
Find and Delete Duplicate Photos in Canon/Nikon Camera Clicked Photos
Clicking pictures is all about capturing every moment perfectly. Photography enthusiasts make it their priority to ensure that they have the best shot with them, and in the process, they have to click multiple similar shots. Cameras have advanced in the ability to capture and share however if there’s one thing that they cannot do is remove duplicate photos from the storage.
The storage capacity of a camera is relatively less than any computer system or a mobile phone and hence you have to be careful about managing it. But then again, duplicate photos are always present, especially in Canon/Nikon cameras.
Talking about DSLRs in general, the idea is to capture a frame perfectly. If there’s even a slight discrepancy in the shot, there has to be another one. So how can I remove duplicate photos from a camera? How to find and delete these extra duplicate shots from a DSLR? That is what we are going to explore in this blog.
Challenges You May Face While Deleting Duplicate Photos from a Camera
The user interface provided on a camera is to enable detailed photography and it focuses on that only. The screen is smaller, the buttons are annoying to press and thus you can forget about deleting the duplicate using a camera. You need to connect it with a system.
Sometimes, cameras allow you to connect them as an external storage device to your system. This means you can simply plug in the device on your PC and access its storage, like any other external device. However, in a few cases, there is no provision for a connection. In such a scenario, the ideal way is to disconnect the card from the camera and connect it to the PC via a card reader.
Connecting the pictures to your PC gives you a better infrastructure to review the images. More importantly, you can select and remove the duplicates faster on a larger screen. Even though you have connected the device with the PC and have a list of images in front of you, it is not easy to remove duplicate images from it.
There are multiple challenges that you may face. These include -
- Selecting the Duplicate Images and distinguishing them from the original images to remove.
- It is a time-consuming process as you have to sift through the collection of images multiple times to realize similarities.
- Requires precision and an eye for detail as a lot of time the duplicate shots have just a pinch of difference which can change your decision.
- Copying the images on your PC to sort them up is also not a good idea as it may create more duplicates considering the files already existing in the drive.
- Manually going through all the camera-clicked photos’ properties to understand which one is higher quality.
The list of challenges can go on and on. If there’s one thing that you can comprehend from these challenges is that the biggest issue is the manual nature of this sorting process.
What if I were to tell you that you can overcome all these challenges and get the job done in just a few clicks? Well, it is possible with the help of Duplicate Photos Fixer Pro. What is that? Find out in the next section!
Duplicate Photos Fixer Pro - The Easiest Way to Find & Delete Duplicate Photos
You might wonder how a duplicate photo finder tool can help you find similar photos clicked in a camera. Duplicate Photos Fixer Pro is no ordinary photo finder tool. It works flawlessly on multiple platforms and yields exceptional results. It means no matter where your images are saved, they can help you sort them.
If you have camera-clicked pictures with duplicates lying in the folder or the card, do not worry, as this application can help you out. Just follow the steps below, and you will be good to go!
Step 1 - Download and Install Duplicate Photos Fixer Pro on Your System.
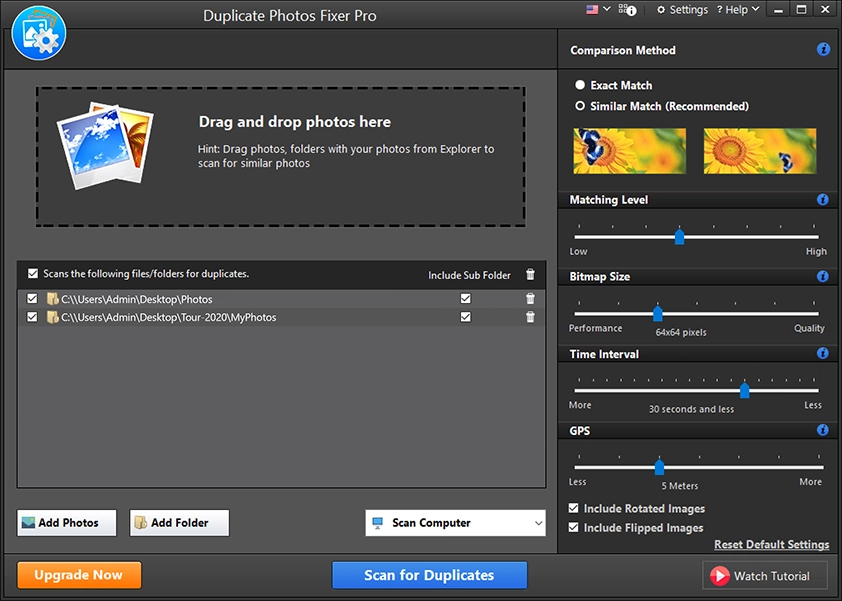
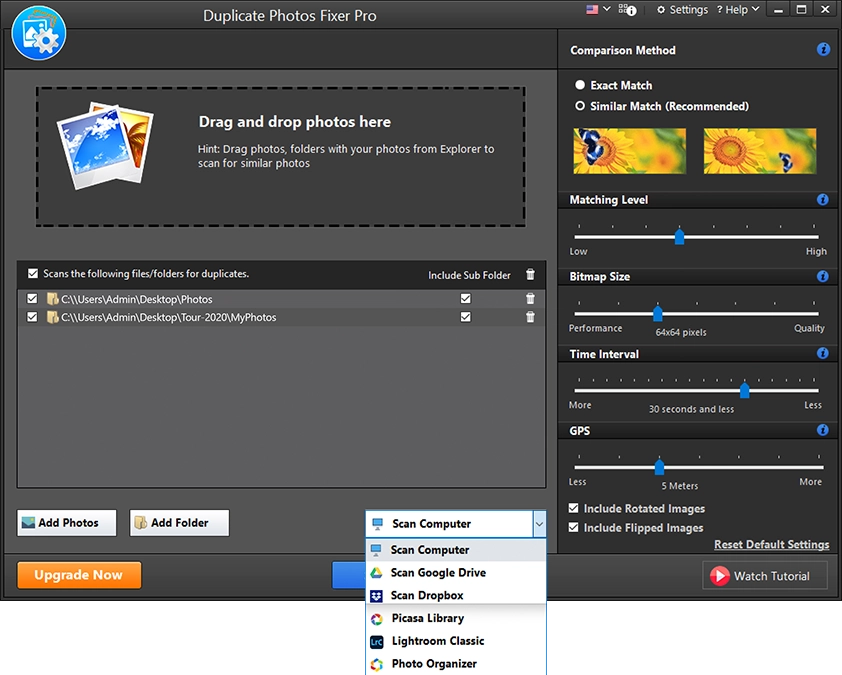
Step 2 - Define the path of images you want to scan through the software. You can scan the entire PC to find existing duplicate photos. However, since you are looking to scan your camera-clicked pictures, choose the destination where these are stored.
Step 3 - Click on Scan for Duplicates to Start the Process. This will initiate the algorithm to compare the images in the folder and group duplicates together. The waiting time for the processing is minimal; however, it also depends on the number of images you have added to the scan.

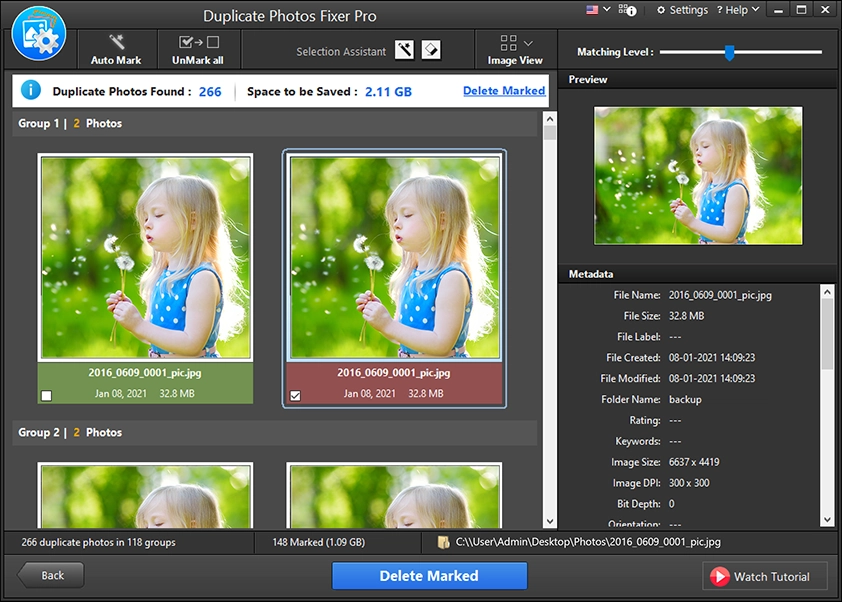
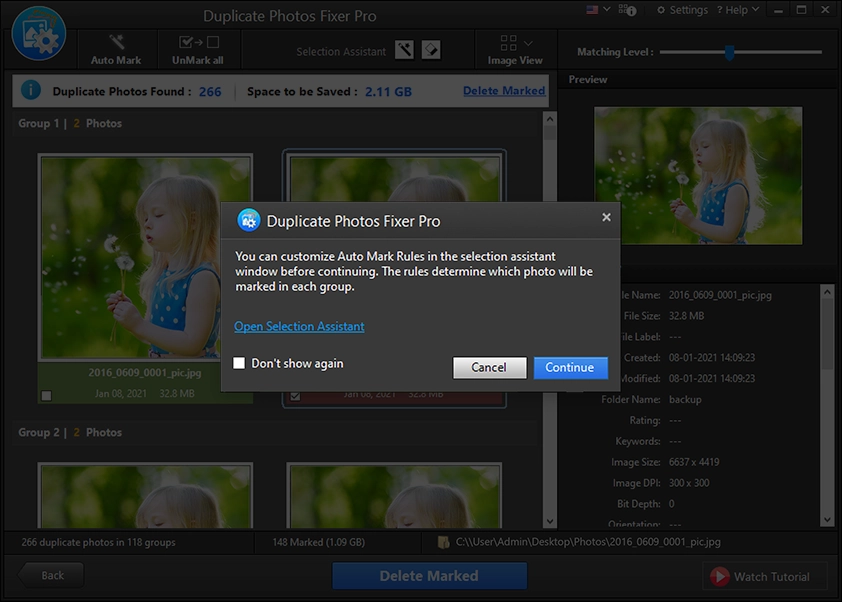
Step 4 - Once the scan is completed, go through the resulting groups. You can mark the images one by one, or set up Automark per your preferences. Automark is a smart way to select duplicates automatically based on certain criteria set by you. The software finds all the images matching your guidelines and removes the rest as duplicates.
Step 5 - Once you have chosen the images you want to delete, click on Delete Duplicates and wait while the system does its job.
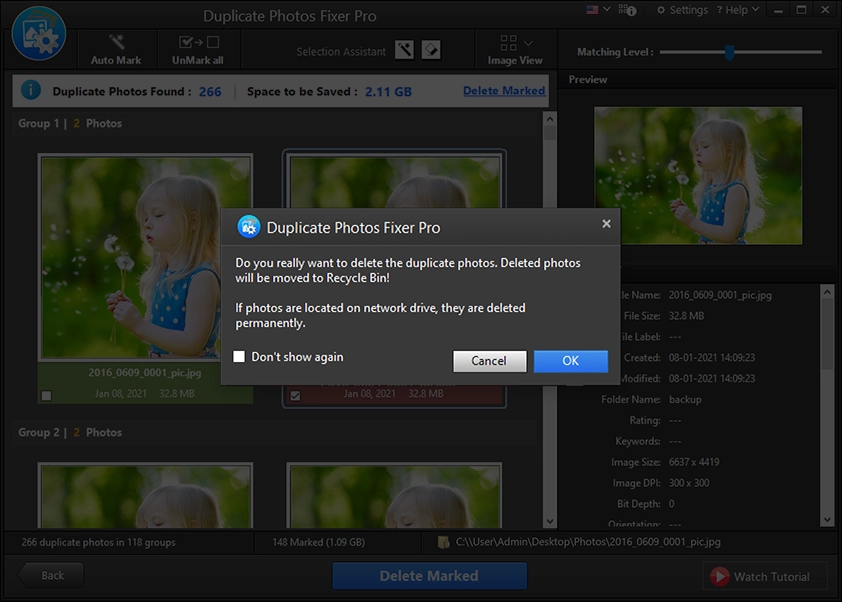
At any moment if you feel that some of the images marked were not to be deleted, do not worry, as all the deleted images are still available in the recycle bin, so you can easily recover them.
Using Duplicate Photos Fixer Pro, you can get rid of all sorts of duplicate, similar, blurred shots that you want to remove in just a few clicks. It does not take up a lot of time, and the best part, it works in the background, which means you can start the process and work on other tasks too.
Download the Duplicate Photos Fixer Pro and remove all the duplicate pictures from your camera-clicked photos instantly!